After a visit to Mesa Verde National Park I wondered how Anasazi pottery was made. The museum at the park contains very little information about how the pottery was made so I set out to answer the question “how to make Anasazi pottery”.
Anasazi pottery was formed from clay using a method called coil and scrape which is still in use today by the Anasazi’s descendants the Pueblo Indians of Arizona and New Mexico. Pots were then painted with white clay and decorated with geometric designs. Finally the pottery was fired with juniper wood in pits that archaeologists call “trench kilns”.
Keep reading to learn more details about how to make Anasazi pottery.
Where did the Anasazi Get Clay?
The Anasazi culture lived in what is today called the four corners region, the only place in the United States where 4 different states come together. This region sits on top of the Colorado Plateau, an area rich in sedimentary mineral deposits including many excellent clays. So most Anasazi village probably had a number of good clays within a short distance that they could choose from when making pottery.
Anasazi potters collected the best grey clays within reach of their villages, which they ground into powder on grinding stones called metates. Then they ground up and recycled some broken pottery, something they always had plenty of, and added this to their clay to act as a “temper” which keeps the pottery from cracking while drying and in the firing. The Anasazi clay body averaged about 12% temper and 88% clay, this mix was then wet and kneaded into a plastic lump suitable for hand building pottery.
For more help with finding and processing natural clays check out our online video class Native Clay 101
How was Anasazi Pottery Formed?
The clay was formed into pottery using a method called “coil and scrape” which is still in use in the Southwest today. Using this method the walls of the pot are slowly built up using long ropes or “coils” of clay that the Anasazi potters rolled out between their hands. The coils are attached to the pot by firmly pinching them together along the whole length of the coil. After the coil is firmly attached it was pinched thinner between the potter’s fingers working slowly and carefully around the pot until the walls are thin and of a consistent thickness.
If the pot was to have a round bottom then the Anasazi potters used a puki to hold the pot and maintain the round bottom while the pot was being made. Puki means a shallow dish in the Tewa language, one of the languages spoken in certain Pueblo villages in New Mexico and Arizona. Today any shallow bowl or dish can serve as a puki as long as the inside is covered with cloth so the clay does not stick. Pukis can be purchased online, see the link on our resource page.

Next the Anasazi potter used a tool to scrape the walls of the pot smooth inside and out. The scraper was usually made of a piece of gourd rind cut and abraded into a disk or kidney shape, sometimes the scraper was made out of a piece of broken pottery. The scraper could be used to push out the form from the inside into a pleasing, rounded form and to scrape down the outside. Special attention would be paid to areas that were especially rough or uneven.
Coils are continually added, pinched and scraped until the pot reaches the desired size. Decorated Anasazi pottery was often painted with a thin layer of pure white clay called a “slip” at this point in the process. After the pot has dried some it is smoothed and polished by rubbing with a smooth stone resulting in an appealing smooth but not exactly glossy finish.
For more help with coil and scrape pottery check out our online video class Coil & Scrape Method
After smoothing the pottery may be decorated with designs. Some times the pot is painted with a mineral based paint and other times with a plant based paint derived from boiling down the Rocky Mountain Bee Plant. Paintbrushes were made from the leaf of yucca, a desert plant. Once the pot is fully dried it is ready for firing.
How was Anasazi Pottery Fired?
Anasazi potters practiced a sort of community pottery firing. They would fire many pieces at the same time so I imagine that they saved up until they had enough pottery that needed to be fired then several households would probably fire all their pottery together. The location where the pottery was fired was frequently far from the village, sometime many miles away. It appears that they would carry the pottery to an area where there was abundant firewood which would have been scarce near the village because of constant demand for cooking and warming fires.
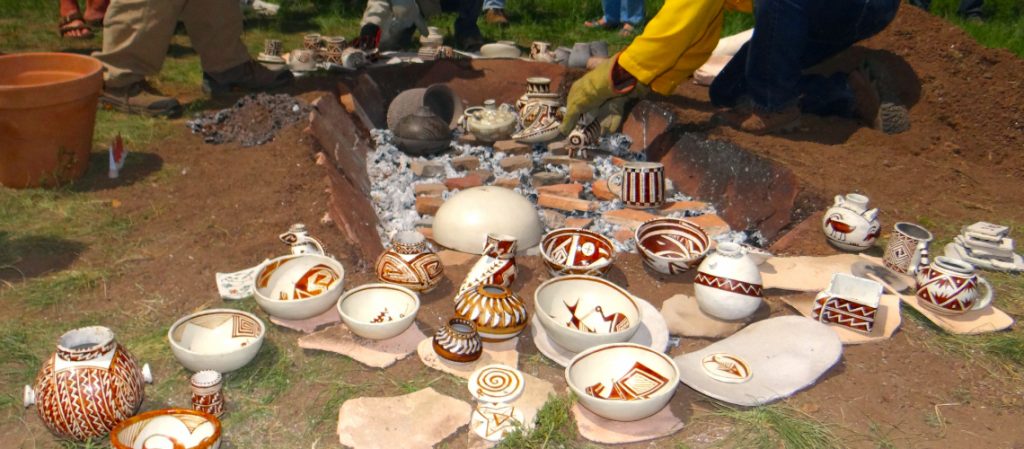
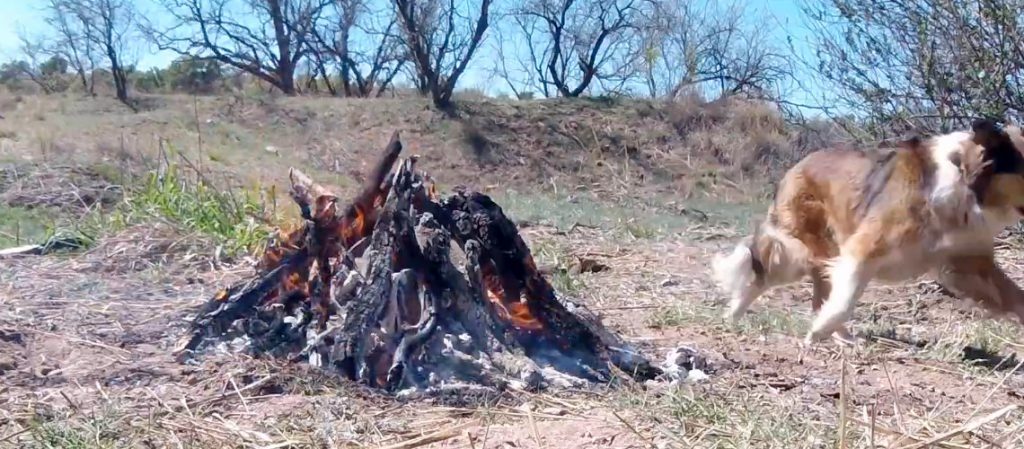
The Anasazi trench kiln was most often a rectangular pit dug into the ground about 12 to 18 inches deep and lined with stones. In the first step a fire was built in the trench and allowed to burn down into a thick layer of coals, this step is called the “primary fire”. While the primary fire is burning, the pottery is set near the fire to allow it to gently heat up, the “pre-heating” is intended to drive off any remaining moisture in the clay. The majority of pottery breakage during firing is caused by moisture in the clay not by air bubbles as is commonly believed.
Once the primary fire has burned to coals, stones are placed on top of these coals in the trench, these are referred to as “kiln furniture” and keep the pottery from directly contacting the coals which can leave blemishes called “fire clouds”. The pottery is stacked on the kiln furniture and “cover sherds”, broken pieces of pottery, are stacked over the top of the pots to keep the firewood from touching the pottery being fired. A thick layer of firewood is now stacked over the top of the trench and all around the pottery and lit. This is called the “secondary fire”.
The fire gets very hot, around 1000° Celsius or 1830° Fahrenheit. Shortly after the temperature reaches its peak the potters would begin heaping dirt over the trench kiln, smothering the pottery and the fire, starving both of oxygen. This low oxygen environment is the secret to getting the whitest white clay and the blackest black paint, resulting in that classic Anasazi black on white pottery they are so famous for today. At this point the potters had to wait until the pottery was cool enough to touch which would take many hours so they may have just gone home and returned another day to collect their pots.
When the pottery had cooled enough the kiln had to be dug up to reveal the finished pots as you can see in the image below where modern Anasazi pottery replicators are digging out their finished pots.

Rediscovering the Ancient Process
Archaeologists have found thousands of Anasazi trench kilns around the four corners region. Up until 1992 when archaeologists at Mesa Verde National Park excavated nine of these kilns nobody really knew for sure how Anasazi pottery was made. A potter named Clint Swink was called in to help interpret what the archaeologists had found. Swink had been working for years to reproduce Anasazi pottery but had been so far unsuccessful in figuring out the firing process, but using the data from this excavation he was able to crack the code as it were and figure out how these trench kilns were used to make Anasazi pottery. Clint Swink went on to teach a whole generation of Anasazi pottery replicators how to do it and even wrote a book on the subject which you can purchase on Amazon here.
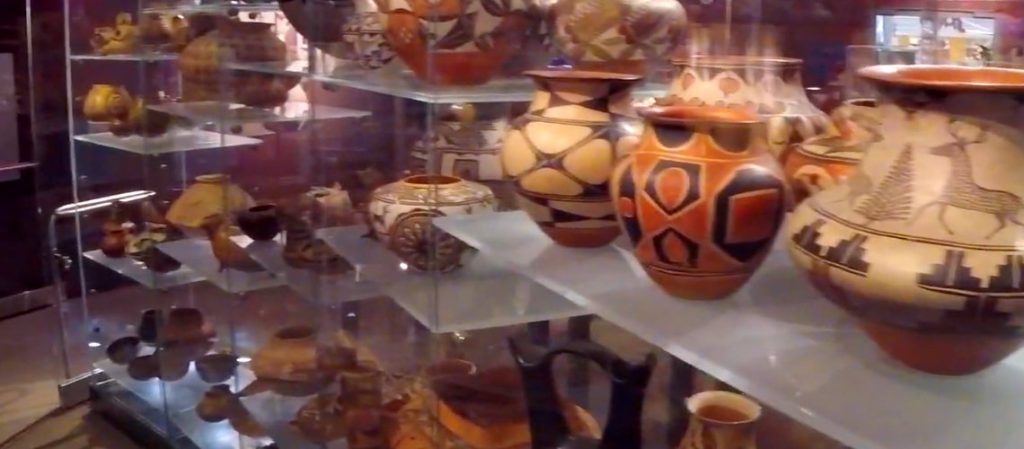
It is interesting to think about all the beautiful pieces of Anasazi pottery sitting in museums or on collector’s shelves and all the unknown artists of centuries ago who worked so hard to create it. How they followed this arduous process without the help of steel shovels to dig the clay or steel axes to cut the firewood, or plastic bags to keep the clay from drying out or a million other conveniences that we tend to take for granted today. And while they were producing this beautiful pottery they were probably also cooking, caring for children, mending or making sandals and a million other things that Anasazi moms did. Knowing what I do about moms, how hard life must have been in the twelfth century and how difficult the process of making Anasazi pottery is, I can’t help but feel deep respect for those potters who produced amazing work using simple tools under difficult conditions.
Learn More
If you are interested in learning more about how to make Anasazi pottery, we offer online video-based pottery classes on all aspects of the art form, finding clay, coil building pottery, outdoor firing, etc. If you have questions or comments about this article, leave a comment below. We also have a YouTube channel that covers many aspects of making Anasazi pottery.
If you are would like to watch an Anasazi trench kiln firing, you should try to attend the Southwest Kiln Conference. An annual event that brings together archaeologists and potters to experiment and recreate Anasazi pottery. Visit the Southwest kiln Conference website here.


trying to subscribe. not getting confirmation e-mail
Have you checked your junk mail, that’s what usually happens.