I came at pottery backwards. It seems most people learn pottery on the wheel first and then explore hand building later. I learned to hand build first, this is probably the reason why hand building has remained my passion and the primary way that I form pottery. Because I am a hand building guy, I am often asked to demonstrate how to make hand built pottery, so I decided to write this article to make this knowledge available to many more who want to learn how to make hand built pottery.
Hand built pottery is defined as pottery made without the use of the potters wheel, pottery that is made using only hands or simple tools.
It is very satisfying to create beautiful pottery using only hands and simple tools, it can connect the potter to the pot and to the earth it is made from. Some potters make their careers in hand built pottery but most just dabble in it from time to time. Whatever your motivation is, you would do well to at least familiarize yourself with the hand building techniques outlined in this article. These techniques will broaden your skillset in clay and allow you to create new and surprising forms that are not possible with the wheel.
What Tools Are Required?
Hand built pottery by definition uses only simple tools or even no tools, so consider all of the following tools as optional.
- Ware board for flat bottom or puki for round – this element will hold the base of your pot while you work your way up to the top.
- Plastic bags – to keep clay from drying out.
- Water bowl – to keep water handy while working
- Wire clay cutter – for lopping off hunks of clay or trimming rims.
- Knife – cutting clay as needed.
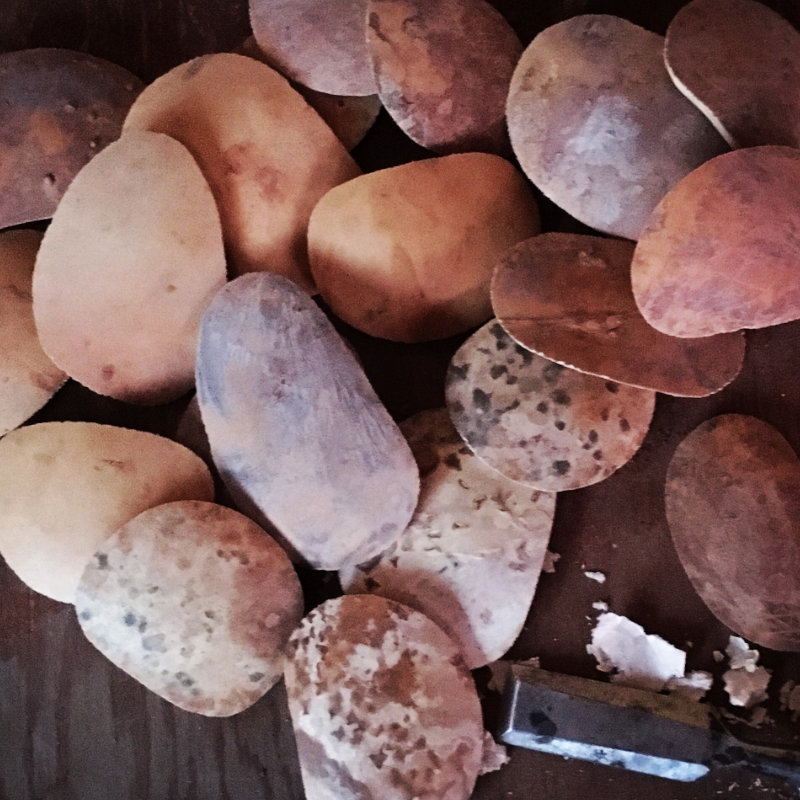
- Ribs (metal, rubber or gourd) – pushing out forms, smoothing coils, scraping off high points.
- Rolling pin – for rolling out slabs of clay.
- Hand towel – for cleaning your hands.
- Sponge – for wetting and smoothing clay.
- Hard edged scraping tool (wood, metal, bone or plastic) – for scraping pot walls thinner and smoother.
Many of these items are common household items or can be purchased at any ceramic supply store. A few of the more hard to find items like pukis and gourd scrapers are linked to from our materials page linked here. Remember though that all tools are optional for hand built pottery, a tool merely gets between the potter and the clay, try to stay as closely connected to the clay as you can.
Best Clay for Hand Building Pottery
Hand building does not require specialized clay, the same clay used for wheel throwing will work just fine. Although there are some characteristics that make a clay more suitable for hand building.
When making hand built pottery I have found that it is best to work with clay that is a bit dryer than is typically used for wheel pottery because this gives the clay more wet strength, a critical characteristic for hand building clay. Clays used for hand building can be more heavily tempered (grogged) than throwing clay. The additional temper will add to the wet strength and make the clay more “toothy” but since it is not flying through your hands at high speed it should not wear too heavily on the potter’s hands. So to recap, good clays for hand built pottery:
- Contain more temper (around 20%)
- Have higher wet strength
- Are often worked dryer than for throwing

Slab pottery
The slab method of forming hand built pottery is fairly easy. It is a good choice for beginners who might struggle with coil or pinch pots. Slab construction is easiest for square or cylindrical forms. With a little ingenuity a more advanced potter can use slab techniques to create almost any form.
These are basic instructions for building a slab box.
- Start by rolling or patting out a flat slab of clay.
- Then with the slab laying flat on your work surface cut out the bottom and sides. Tip: cut out a paper template to make sure the sides are the same.
- Score both sides where the slabs will connect, then apply a layer of slip (thin watery clay).
- Firmly but gently press the slabs together.
- Roll a thin coil of clay and press it into the inside of the slab joint.
- Use a tool or your finger to smooth the outside of the joint until no trace remains.
- Continue the above to form a cube. If you want to elaborate you could add a lid, feet, handles, use your imagination to make it your own.
Pinch pots
A pinch pot is a pot made from one lump of clay so there are no joints. You might think that this is easier than a slab pot but there is some technique involved here that may prove more difficult to master.
Begins a pinch pot with a lump of clay, the larger the pot desired the larger the lump. If you are a beginner then I recommend you start with a small lump, maybe smaller than your fist. Here are some basic step-by-step instructions for forming a small pinch pot.
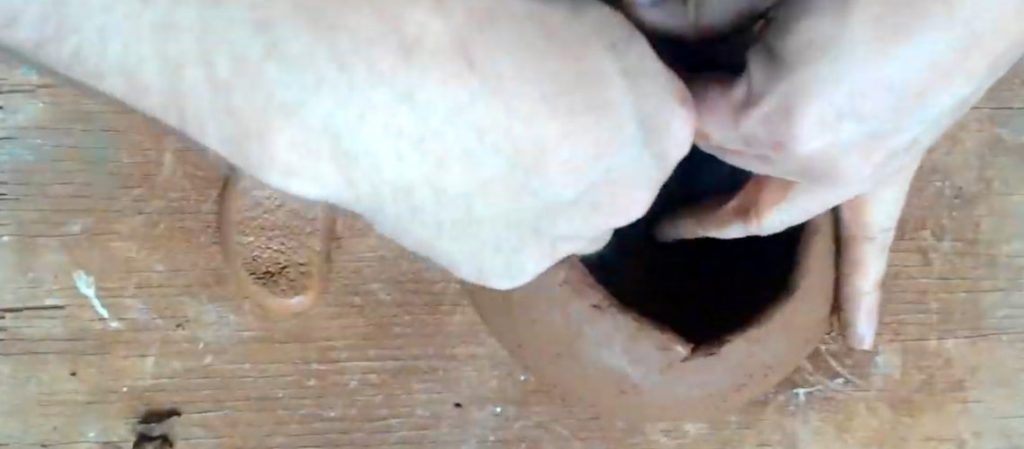
- Stick your thumb into the center of a ball of clay
- Press firmly from the inside of the lump to expand the diameter of hole in the ball of clay until you have a small, very thick pot.
- Use your fingers to press the walls of the pot thinner and thinner. This will require applying pressure from both sides (inside and outside) of the pot.
- When you have achieved the desired wall thickness gently scrape the outside smooth and trim the rim level.
The pinching and finishing technique for a pinch pot are very similar to those used to create a coil pot so make sure you check out those instructions below.
Coil pots
The coil pot is the ultimate in hand built pottery. Because it can produce almost any shape imaginable from pots to full blown sculptural forms. Let’s take a quick tour of how a coil pot is formed.
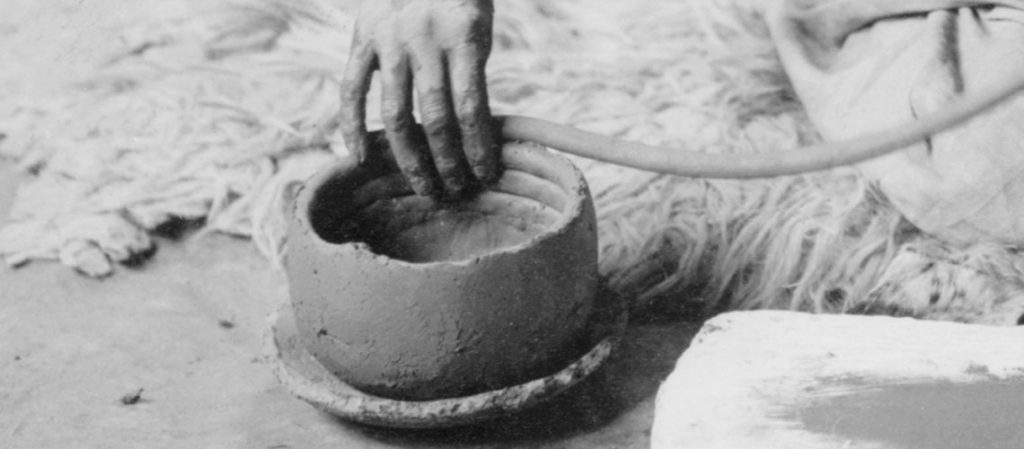
- Pat out a slab for the base of your pot and either place in a puki for a round bottomed pot or on a ware board for a flat bottomed form.
- Roll out a coil of clay about an half inch in diameter.
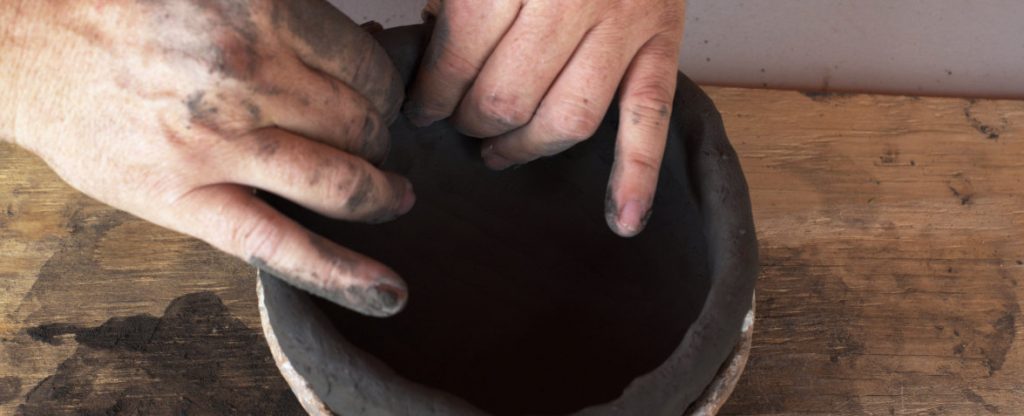
- Attach the coil by pinching firmly into the base all around the circumference of the pot on the outside of the pot.
- Pinch the coil thinner between your thumb and forefingers until the pot wall is the desired thickness which is usually around a quarter inch.
- Scrape the inside of the pot smooth with a rib, obliterating all coil seams.
- Scrape the outside of the pot smooth with a rib making sure all holes get filled and all lumps get scraped down smooth.
- Continue to add coils, pinch, scrape and smooth until you reach the desired height.
- Trim the rim even with a knife or wire and smooth with wet fingers.
Hopefully you find the above list helpful. Coil pottery is a bit complicated to learn from an article online, it is better to take a class or watch some videos, here are some links to those that I have produced.
Like any clay art, practice is the key so don’t give up. With some work and persistence you can become a hand built pottery master.
Other Hand Building Methods
Many sources will say that there are three methods of hand building pottery but that is short sighted. There are others and potentially others not yet invented. First of all consider hybrids projects that combine slab, pinch and coil techniques.
In the western portion of the American Southwest (as well as other parts of the world) there is a hand building technique called “paddle and anvil” where the pot walls are built up and thinned by paddling between a wooden paddle on the outside and a stone or ceramic anvil held on the inside. This pottery technique can produce very strong pottery because the paddling compresses and aligns the clay particles.
I have tried my hand at paddle and anvil but have never been very good at it. You can learn more out the paddle and anvil technique by watching this video of my friend Tony Soares.
More info about hand built pottery
There is a lot to learn about hand building pottery. When I was trying to learn coil pottery I had difficulty finding a teacher, fortunately the internet has rectified that problem and now you can learn almost anything from anywhere on earth. Check out my YouTube channel linked here where I post new videos weekly on the subject of coil pottery. You can also read further posts on. this website by following this link to our blog archive or check out our selection of online video based classes by following this link.