If you ever learn about Native American Pueblo pottery or really any sort of traditional Southwestern pottery you will eventually hear the work “puki” used. And if you are new to Southwest pottery you will no doubt wonder “what is a puki”? No worries, I am here to set the record straight. I have been making traditional Southwest pottery for over thirty years using pukis and this article will set to rest that age old question ‘what is a puki and how is it used to make pottery’.
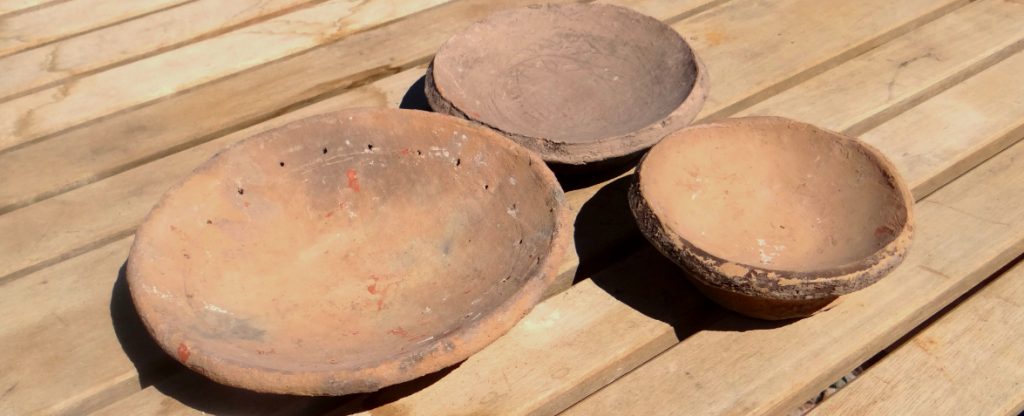
A puki is a shallow dish used to hold the rounded bottom of a pot being formed by hand. It protects the soft pot bottom from being flattened on the work surface and allows the pot to be easily rotated and moved about by the potter during the forming process.
Puki is simply a Tewa word for a shallow dish. Tewa is a language spoken at several Indian Pueblos in New Mexico and Arizona. A number of preeminent Native American potters are native Tewa speakers including Maria Martinez of San Ildefonso Pueblo, Margaret Tafoya of Santa Clara Pueblo and Nampayo of Hano.
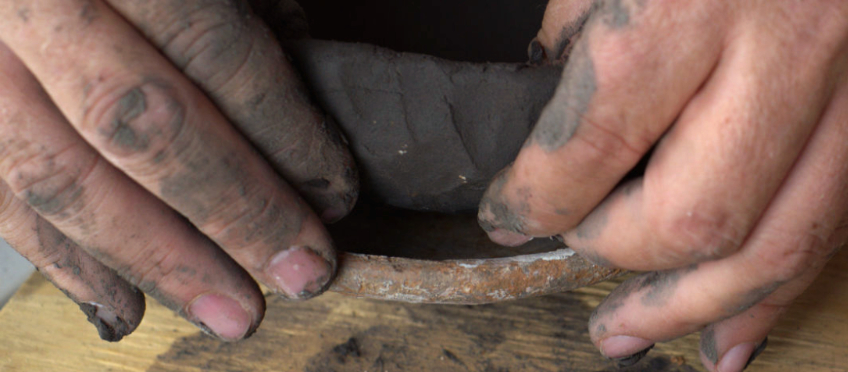
Working with a puki
When using a puki it is best to start with a slab of clay. Gently press this into the puki being careful not to stretch the clay too far or to tear it. Then use a damp rib to press the clay firmly into the bottom of the puki, allowing the puki to mold the pot bottom. Trim away any excess clay leaving an even rim on which to attach a coil. You will want to leave a rim of clay at least a half inch above the top of the puki onto which you can attach your first coil.
I have written an article with basic instructions on making a coil pot that you can see here, for more detailed coil pottery instructions check out my online video based class which you can learn about at this link.
As you work on the upper portions of the pot the puki will protect the bottom as you rotate and move the pot around the work area. Once you are done forming the pot and the clay has firmed up enough to be handled you will want to take the pot out of the puki and give attention to the bottom, filling any holes with clay and scraping off any lumps. This is really the hardest part of using a puki, the timing of working on the bottom and gently smoothing it without damaging the pot. More details on dealing with these issues are found below.
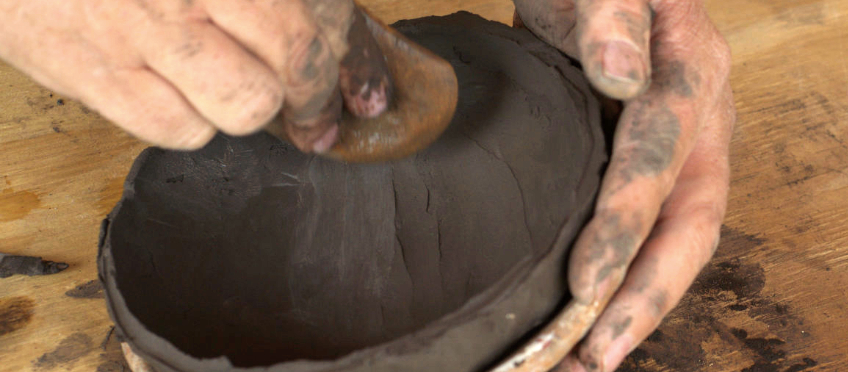
Using a puki offers several advantages when making hand built pottery, some of these are:
- The puki provides a mold for the bottom of the pot, allowing you to make fast progress in forming the bottom third of a vessel.
- A puki allow you to easily rotate the pot as you work on the upper portion of the pot. Essentially acting as a simple potter’s turntable, allowing the work to be rotated and moved around without damaging the soft clay.
- Using a puki allows you to hand build a pot with a rounded bottom. Without a puki, or some other form of support, the bottom of the pot will become flat when you set the soft clay on the flat work surface.
Puki problems
Problems can sometimes develop when using a puki. Here are a few of the more common problems encountered when forming clay in a puki and how they can be dealt with.
My pottery has a bad puki shoulder
As you build your pot higher by adding more and more coils, be careful not to push your walls out too far beyond the edge of the puki. This can cause a lip that is hard to deal with later.
If after pulling your pot from the puki you find that you have a large lip where the pot walls overlapped the top edge of the puki there are two things you can do about it. You can use either of these methods or a combination of both.
- First I see how much of the lip I can scrape away. Use something with a hard edge like a sharp piece of bone, a knife edge or even the edge of a credit card to scrape away as much as you can without ruining the structural integrity of the pot.
- Fill in any holes with fresh clay and scrape smooth using a damp rib.
It is not uncommon to see puki lines on ancient pots. Somehow to me it is comforting to know that the prehistoric Native American potters dealt with the same issues we face today. I must be doing something right.
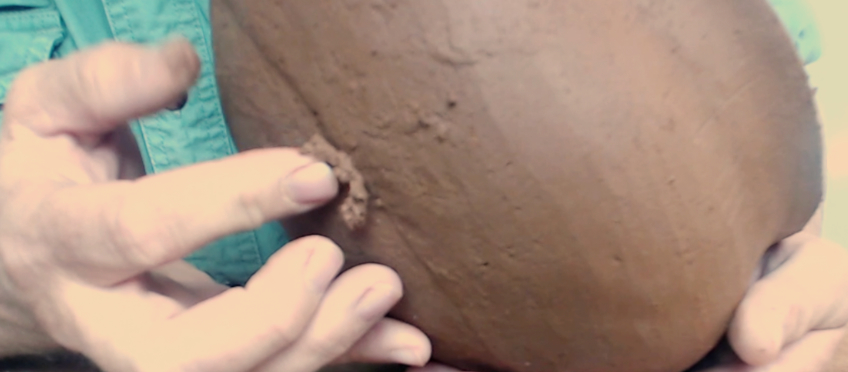
My puki has a rash
When you pull the pot out of the puki you may find the bottom quite rough and ugly, I call this “puki rash”. You will need to gently scrape the rough areas with a damp rib and/or a hard edge scraper such as the blunt edge of a knife or the edge or a credit card. Use little balls of fresh clay to fill any hole and divots you find.
You may need to handle the pot very gingerly if it is still somewhat soft. If you find that you are misshaping the pot then you are best to put it back in the puki and wait until the clay has firmed up more before attempting to work the bottom. The timing will depend on the quality of the clay you are using, the thickness of your pot’s walls as well as other factors, play it by ear. I have found that sitting on the floor and cradling the pot in my lap provides more support and allows me to work the bottom with less accidents.
Help! I’m stuck in a puki and can’t get out
Traditionally pukis were made from earthenware pottery and thus were porous allowing any clay pressed in to slowly dry. Drying causes the clay to shrink and eventually any pot will come loose from the puki. I try to always make mine from earthenware, details of how to make your own are below. Many modern potters make pukis from Plaster of Paris which provides the same porous nature allowing any pot formed therein to free themselves with time.
The problem comes when people try to use kitchen dishes as a puki. If the dish is made from glass, plastic or glazed ceramics then it is not porous and the clay stuck into them will never dry, shrink and come free. So if you have formed a pot in one of these types of dishes and are looking for a solution you might as well start over, your clay will never come out of there except in little pieces. If you want to use a non-porous dish as a puki, first cover the dish with a piece of cloth or newspaper which will keep the clay from sticking to the dish.
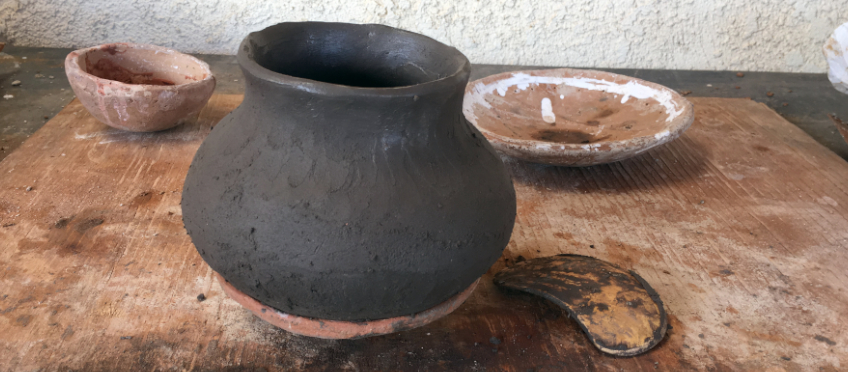
Making a puki
You can make your own puki fairly easily with a little time and effort.
To start with you will want something round to act as the form, traditionally pukis were formed on the bottom of an upturned pot. You can use anything that is the size and shape you desire for your pot bottoms. It can be fun to just browse through a store looking for the shape you want, kick balls, dishes, balloons, woks, and all sorts of round objects can be used to form a puki. If the puki form is non-porous make sure you cover the surface with cloth or newspaper first so the clay will not stick.
Now create a slab of clay large enough to cover your form. You can pat out the slab between your hands, rollout out with a rolling pin or use a slab-roller. Now with the clay slab laying flat on your work surface cut it into a perfect circle, you can eyeball it, use a compass or a plate or other round object as a guide.
Lay your round slab over or into your form (depending on whether you are forming on the outside or inside of the object’s form). Use a damp rib to gently press the clay into the shape of the form then let it sit and firm up a bit before moving.
When the clay is firm enough to move without losing the shape carefully lift it from the form and set it upside down on the work surface and allow to dry further. After it has firmed up more smooth the surface and the rim. Be aware that leaving the clay to dry too long on the outside of a form can cause it to crack as the clay shrinks and contacts around the form.
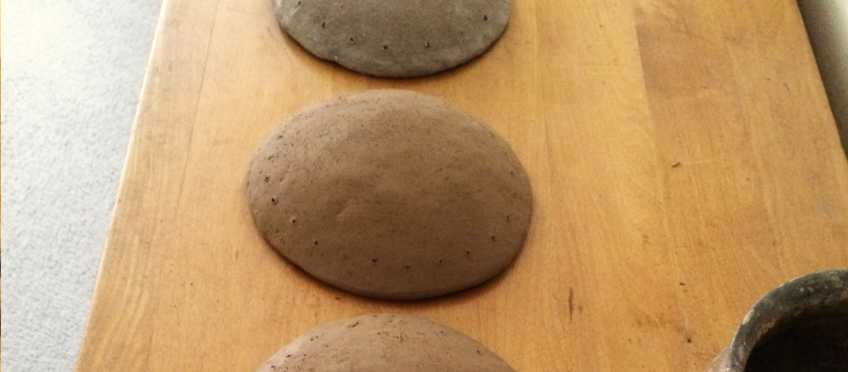
A puki does not need to be very smooth as it is just a rough tool. Prehistoric pukis excavated from archaeological sites have the same rough texture as the ones used by Southwest potters today. It is not good to have holes and lumps in the surface of your puki but you also do not need a polished surface either.
For more detailed instructions for making your own puki see my online video based lesson on this subject at this link.
More information
Traditional Southwest pottery is a fun and fascinating hobby and pukis are just one small part of it. Check out the other articles on this website to learn more about how hand built coil pottery is made in the American Southwest, this link will bring you the blog page where you can see what other subject we cover here. We also sell a few tools used for making primitive pottery follow this link to see the materials page. Finally we offer online video based classes on how to make pottery like the ancient people of the Southwest at affordable prices, you can see the classes we are currently offering at this link.

I subscribed to the newsletter but I’m not sure how to get the lesson.
Hi, i have this very old burned pottery that resembles a puki, it has small handle like markings, the inside is round, the wall is thick and is blackish from fire, any ideas?, thank you
Could be a puki or something else, who knows?
What size of a puki would start out with as a beginner? Small, Medium and Large ie 4″ , 6 “, 8”
Andy, I did sign up for several things and really wanted that “how to” puki lesson but cannot find access to it. I’m going to try and put something together- you’ve certainly described the process well! Just wish I’d have received the lesson.
You should have received an email with the coupon code. I can’t give you the code here in the comments but if you send me an email using the contact form I will send you the code for the free lesson. Sorry for the difficulty. Andy